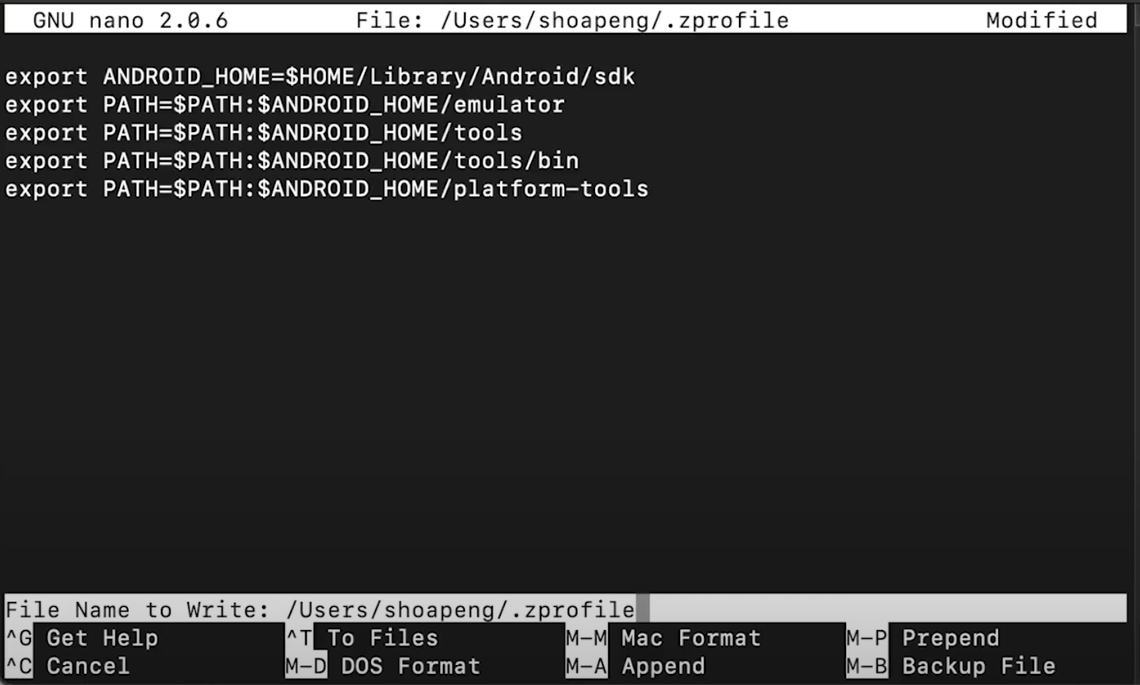
Building a React Native App From Scratch Part 2: Setting Up Your Development Environment
Blog

Building a React Native App From Scratch Part 2: Setting Up Your Development Environment

October 19th, 2021

Part 2 of our guide on how to create a React Native app from scratch. Learn how to set up your development environment.

Shoapeng
  by Shoapeng

Welcome back to part 2 of our React Native series. We’ll be showing you how to create a React Native app from scratch. In this part we are going to focus solely on setting up our development environment and the necessary tools needed to get things up and running.


Depending on the type of OS you have, whether it is a Windows, Mac or a Linux, setting up the appropriate development environment will require some different steps but overall they’re all very similar. In this article, I will be setting up the environment from a Mac perspective, but I will show you which areas differ for Windows / Linux. The usual flow for installation is to basically install Node and the appropriate software for Android and iOS. Keep in mind that if you are on a Windows or Linux computer, you won’t be able to run your project on an iOS simulator. iOS is specific for MacOS. Of course we are able to use the expo client to run our project but in this specific article we will not cover expo, that will be for a future article so stay tuned! 

Table of Contents


FOR ANDROID AND IOS

Step 1: Installing Node


FOR ANDROID ONLY

Step 2: Installing JDK & Android Studio

Step 3: Setting up SDK Platforms / Tools

Step 4: Setup Android Emulator

Step 5: Setting up ANDROID_HOME environment variables for ANDROID AND IOS

Step 6: Creating a new application

Step 7: Running our React Native Application


FOR IOS ONLY

Step 1: Installing XCODE

Step 2: Installing Cocoapods and pods

Step 3: Running on iOS Simulator

Step 1: Installing Node 


The very first step that we need to take is to install Node! Node is a server-side Javascript runtime environment. It is in charge of building our javascript code. Specifically for React Native, Node will use a server side build script called Metro to bundle our javascript. Metro takes in options, an entry file, and gives you a bundled Javascript file that includes all our code. One of Metros main features is to provide sub-second reload speeds which provide that fast refresh feature. So to add in the package, we simply need to run 


MAC

$ brew install node

Homebrew or brew, which is specific for MacOS, is a package manager that makes it super easy to install applications. 


Windows

For windows, we will need to run powershell and install via Choco, which is the recommended package manager for Windows. Just start a powershell session with the administrator rights. This will go ahead and install node as well as JDK for us! This will take a while, don’t touch it! It’s not actually frozen.

$ choco install -y nodejs.install openjdk8


Linux

For Linux, you may just follow the instructions directly from Nodejs.org based on your distro. Select your appropriate distro and just follow the steps.


[ https://nodejs.org/en/download/package-manager/ ]


I will be continuing from a Mac perspective. Here is a screenshot of the installation of node.


image 1

If you get this similar post install issue, just simply run the command provided to do any post installation steps.


 $ brew postinstall node  


After successfully installing node, we will then need to double check that node has actually been installed by running. Which should return us our appropriate node version. Node needs to be at least version 12 or higher but if you are following this tutorial from scratch, you shouldn’t have to worry about this as it will install the latest one for you.  


 $ node -v

image 2

After installing our package, we next need to go ahead and install watchman by using the following command. To quickly summarize, watchman is basically a tool that detects any file system changes, your code changes, and automatically builds and pushes updates to the device. This is not a necessary installation but is recommended for better performance. 

-------------------------------------------------------------------------------------------------------------------------------

MAC

$ brew install watchman

image 3

Windows

Watchman isn’t necessary to install for Windows


Linux

Watchman isn’t necessary to install for Linux

-------------------------------------------------------------------------------------------------------------------------------

Step 2: [ Android ] Installing JDK & Android Studio

For our next step, I will cover the Android side first. In order to have a simulator up and running on our local machine. We first will need to have the JDK, Java Development Kit, installed. JDK is in charge of giving developers the tools needed to create Java programs. We need to also have the program, Android Studio, installed which will house our emulators. Let’s go ahead and focus on installing JDK first. We will need to use Homebrew again, our package manager, by running the following command. Just type in your password when asked. For Linux, it is recommended to download from [ https://adoptopenjdk.net/ ] or your package manager of choice.


$ brew install --cask adoptopenjdk/openjdk/adoptopenjdk8

image 4

Next, let’s download Android Studio [https://developer.android.com/studio]. 

image 5

Just go ahead and drag and drop it into your applications folder. For Windows and Linux, follow the instructions. After we have finished installing Android Studio, we need to go and make sure we have all the correct options ticked! Let’s navigate to the SDK manager within Android Studio to install the correct SDK.


Step 3: [ Android ] Setting up SDK Platforms / Tools

Inside the SDK manager, we need to make sure we have Android 10.0(Q) selected as an option. After you have checked this option, go ahead and hit apply to install it. React native requires at least Android 10.0 or newer, so it's good to just have it included.

  • Android 10.0 (Q)

Our next step is to make sure we have the correct SDK Tools selected.


  • Android SDK Build-Tools 31

           Android SDK Build tools is a component of the Android SDK which is required               for building React Native’s Android side.

           [ https://developer.android.com/studio/releases/build-tools ]

  • Android SDK Command-line Tools (latest)

          Android SDK Command-line Tools are basically a collection of packages for                    android development as well. You can follow this link for all the packages                        installed. 

          [ https://developer.android.com/studio/command-line ]

  • Android Emulator

           This is for the emulators.

  • Android SDK Platform-Tools

          Android SDK Platform-Tools include tools such as adb, fastboot, and sytrace.                  These tools are required for android development.

         [ https://developer.android.com/studio/releases/platform-tools ]

image 7

Hit apply for any missing options and install. Last step for the SDK is to check 


  • Show Package Details


So we can go ahead and open up Android SDK Build-Tools 3. Make sure that 29.0.2 is checked as well, hit apply and continue.

image8

Step 4: [ Android ] Setup Android Emulator


Let’s set up our emulator for Android next. Go ahead and open the AVD Manager. 

image 9

AVD, android virtual device, will be where all your emulators are housed. Here you can make as many emulators you deem necessary for your application. The tricky part about mobile development is that there are many sizes and forms of devices. There, of course, are ways to create your components so that they are compatible with every screen but it's good to get at least a few emulators that vary in dimensions. As you can see in the screenshot below, I have an android emulator with Android 11. Let’s go ahead and set up a new one. Go ahead and click on Create Virtual Device.

image10

We are first presented with a bunch of different types. Looking from the left side, there are different categories, from TV to Automotives. Moving onto the Phone section, we are presented with a bunch of different types of phones. Just select one for the time being, as stated up above, we will need to do a few during development to test for different phone sizes. 

image11

On the next page, there are yet another bunch of system images we are able to select. Just go ahead and select the latest release. 

image12

Finally we have the selections for our emulator here. The name of the emulator along with settings that we have previously selected. There are startup orientations as well as performance emulations with the device frame. If you don’t need any custom change just go ahead and hit finish.  With Android Studio installed and an emulator created, we are all set with the Android side. The next topic will be to link up our ANDROID_HOME variables. 

image13

Step 5: [ Android ] Setting up ANDROID_HOME environment variables.


Our last step is to link our environment variables to the correct locations. As React Native starts running, it will look at our environment variables for the location of our SDK, emulator, tools, and platform-tools. Without linking the variables, React Native won’t know where to start. Let’s go ahead and take a look at how to set up the environment variables on each system.


mac

Starting off with MacOS, first we want to echo $PATH and $ANDROID_HOME first to double check that it has not actually been linked already. In the screenshot below, you can see that it returns just my local bin as well as empty for $ANDROID_HOME

$ echo $PATH

$ echo $ANDROID_HOME

image 14

After double checking that our variables return nothing, let’s go ahead and create them. One thing to take note of is if you are using bash or zsh. Depending on the shell you use, you will need to edit the appropriate shell config file. I am using zsh in the specific example, so I will continue with that. I will also be using nano, a terminal based editor, to create the file. 

image15

After opening it, we simply need to add in the following lines of code that links directly to our specific locations. 

$ export ANDROID_HOME=$HOME/Library/Android/sdk

$ export PATH=$PATH:$ANDROID_HOME/emulator

$ export PATH=$PATH:$ANDROID_HOME/tools

$ export PATH=$PATH:$ANDROID_HOME/tools/bin

$ export PATH=$PATH:$ANDROID_HOME/platform-tools

image 16

Once copy and pasted, we can go ahead and save the file and move onto the next step. If you are using nano as well, go ahead and Ctrl-C, y, and enter. Which is to save before you close it. Now with that file created, we can now simply run source $HOME/.zprofile. Which will link the environment variables for us. It’s really that simple. If you are using bash or another terminal, just source the appropriate config file.


$ source $HOME/.zprofile

image17

If you are using bash or another terminal, just source the appropriate config file. Finally, we just need to check again that our variables are set up by running the commands once again and we are all set! 

image18

Windows

For Windows, we will need to open to:

1. Open your file manager, or My PC.

image 17

2. Right click and go into properties. Then click into Advanced system settings.

image19

3. Click on Environment Variables button.

image 20

Under User Variables, go ahead and click new...

image 21

5. Finally we can create a new User Variable. Variable Name: ANDROID_HOME

Variable Value: ‘ Location of Android SDK’ - by default, the SDK will be located in %LOCALAPPDATA%\Android\Sdk


** If you don’t know the exact location of your SDK, you can open Android Studio. Open Settings, Appearance & Behavior -> System Settings -> Android SDK.

image22

6. Next, let’s double check that it was properly set up by running powershell and checking. In the image below, you can see that it returned ANDROID_HOME and location 

image 23

7. We aren’t done just yet! Lastly we need to link platform-tools as well.

Go ahead and open back to environment variables then navigate to the Path variable.

image 24

8. Alright I swear we are almost done. Finally, hit New then then just add in a new value. And that’s it!


$ %LOCALAPPDATA%\Android\Sdk\platform-tools

image25

Linux

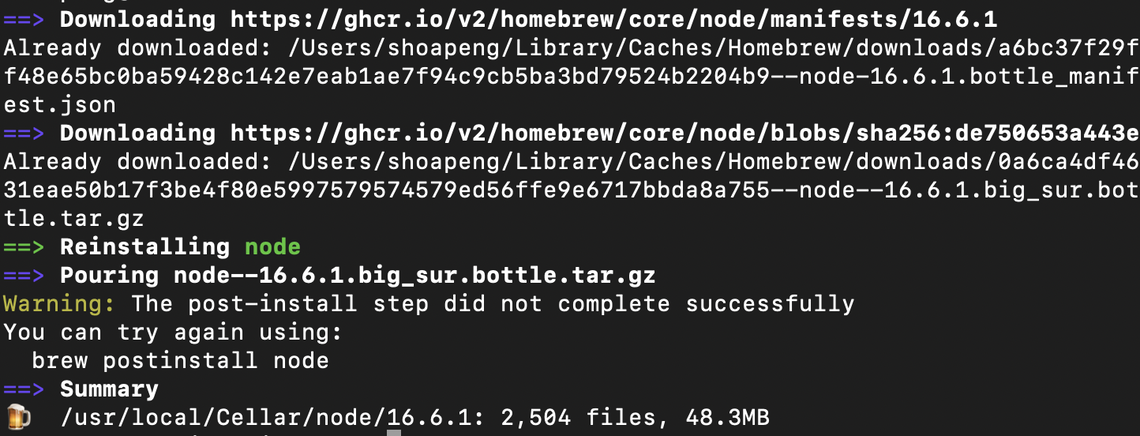
For Linux, you may just follow the MacOS instructions above. It is very similar, just depends on which shell you are using.


Step 6: Creating a new application

Next, we can finally use the command line, CLI, to create our React Native application. The magical command to create a React application is 


$ npx react-native init AwesomeProject


1. Npx , is a tool that is used to execute packages rather than installing packages like npm.

2. React-native, we are going to be using this package to execute a command.

3. Init, create a new project

4. AwesomeProject, this is the name of our project. 


There are also many different types of premade templates that we can create a new project with but for this example, let's start from scratch. After running the command, it will go ahead and create a folder for us on the location where the terminal was opened from. So let it finish then we can move onto the next step.


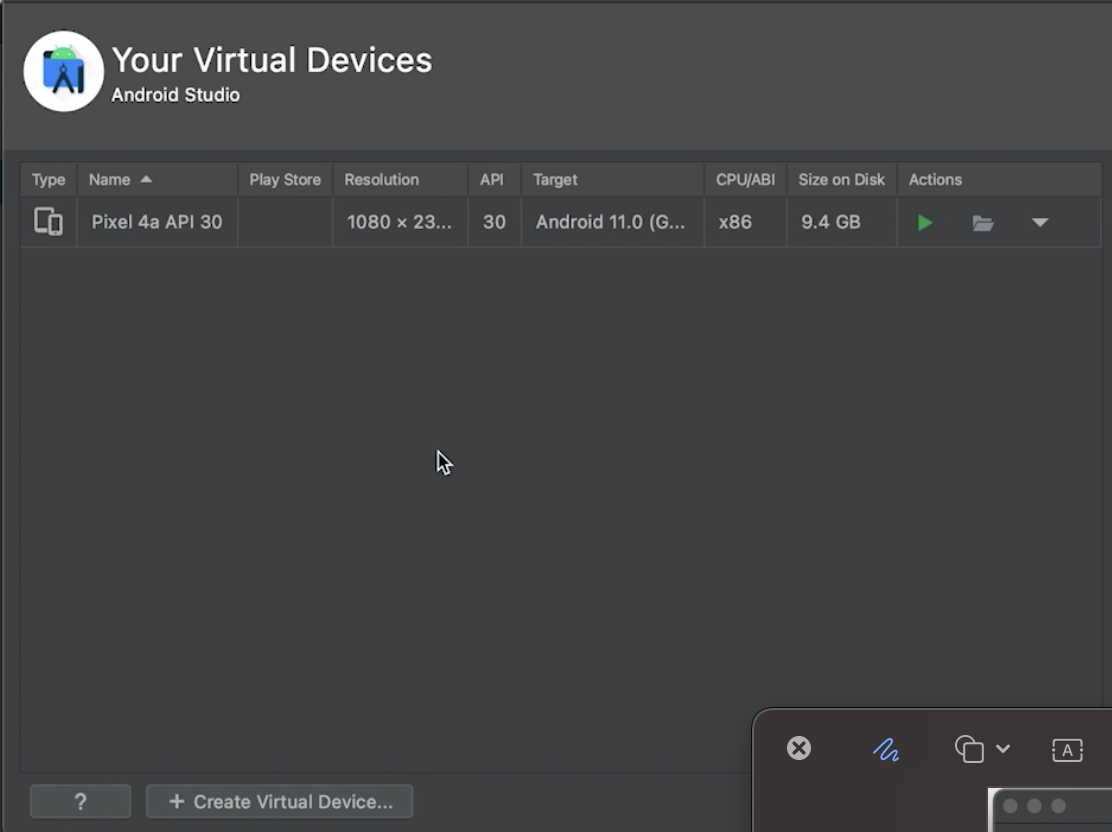
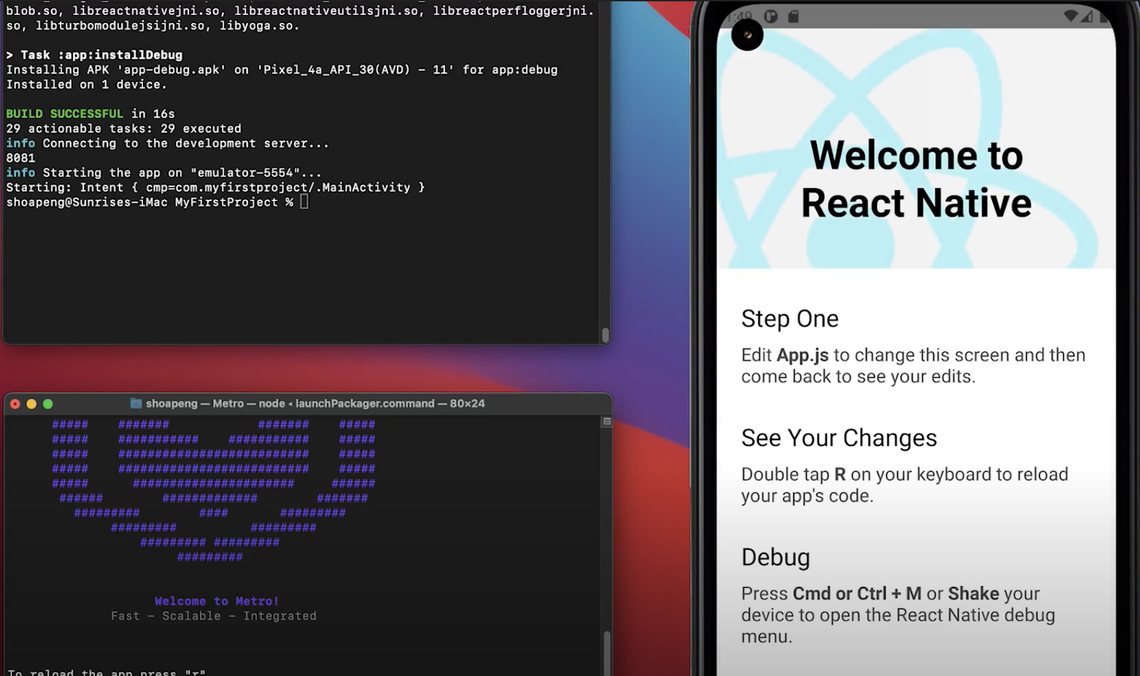
Step 7: [ Android ] Running our React Native Application

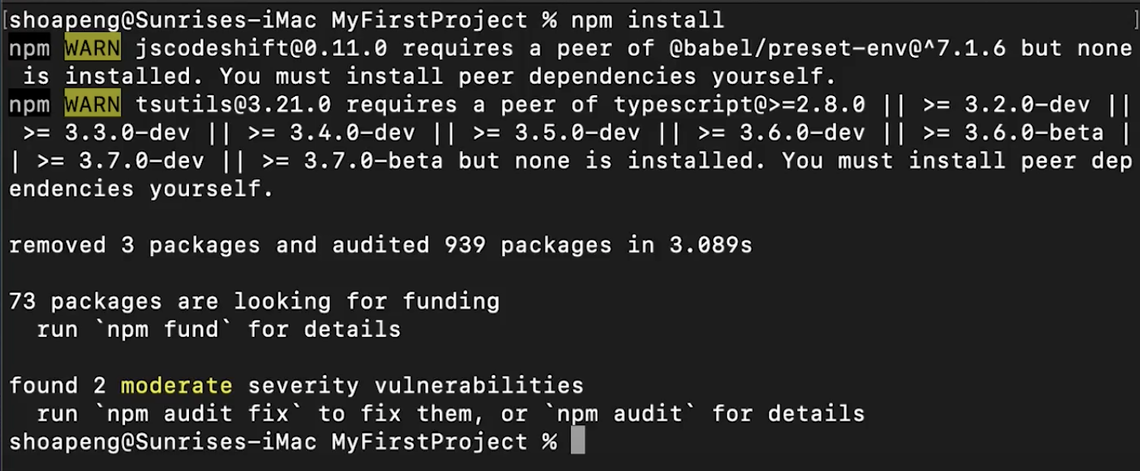
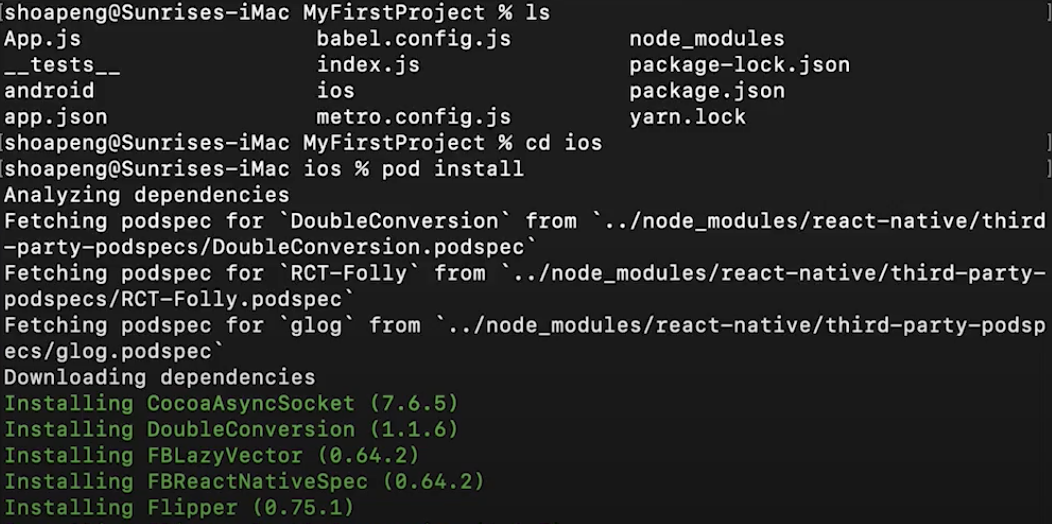
Finally, we have arrived at the last step for running our project on an Android Emulator. In order for us to run it, we need to make sure that the dependencies were installed, so we can go ahead and open a new terminal within the directory of our React Native application. In the screenshot below, I am using cd to go into the directory of my React Native directory. Then just run the command


$ npm install

image 26


Here is the screenshot of finalizing the npm installation.

image26

After installing the dependencies, we simply need to run the final command of


$ npm run android


The terminal will then open another terminal window which will be the Metro Bundler. The Metro Bundler, again, is in charge of wrapping all our JavaScript files into a single file. The emulator should open up on its own as well, directly installing the React Native Application directly into the phone and we are pretty much done! If you have made it here, congrats on following the guide this far! There will always be different kinds of use cases where maybe some issues will pop out. As there are too many possibilities, I will not cover them all here. You can go over to our YouTube video and leave a comment there. We will be more than happy to answer any questions or resolve any issues. If you are on Windows and/or Linux, you can go ahead and stop here as the next part will be about running it on iOS. iOS, like I said before, will not be available to Windows or Linux.

imsge28

Step 1: [ iOS ] Installing XCODE


You simply need to open the app store, search for XCode, and then install it! This will take a very long time depending on your computer and or internet connection.

image29

Step 2: [ iOS ] Installing CocoaPods and pods


This next step is a requirement, which is CocoaPods. CocoaPods is a dependency manager for Swift and Objective C. This will help us install the correct packages on the iOS side. We will need to run the command. 


$ sudo gem install cocoapods  

  1. Sudo is basically an elevated command, it will require you to input your password.

  2. Gem is a package manager for Ruby. 

  3. Install, this is to install of course!

  4. Cocoapods, the package we want to install.

image30

With CocoaPods installed, we can now navigate to our iOS folder within our React Native directory. Then run the command to install the dependencies for the iOS side.


$ pod install

image 31

Step 3: [ iOS ] Running on iOS Simulator


After the pods have finished installing, we simply need to run the command 


$ npm run iOS


Metro Bundler will open again as well as the iOS simulator. iOS side is a bit more simple to get it up and running but you are only able to run it on a MacOS.

image32

Conclusion

If you’ve made it through to the end without skipping anything, then I applaud you for your patience and perseverance to learn! If you have any questions or comments, just head on over to our YouTube video and let us know your thoughts there. I hope you learned something about proper environment setup and are looking forward to learning more. In our next article, we will cover custom React Components, importing packages, as well as adding in our own custom fonts. I'll see you there!  

Using React Native for Mobile Development - Part 2 The Environment

Tags:   react