Building a React Native App from Scratch Part 3
Blog

Building a React Native App from Scratch Part 3

November 24th, 2021

Learn how to view files & folders, create components and add fonts.

Shoapeng
  by Shoapeng

Welcome back to part 3 of our React Native series. In this part we will be viewing all the individual files and folders. After that we will be diving deeper into different types of components provided by React Native. Then finally adding in our own custom fonts into the project. Let’s go ahead and get started!


Reviewing our Files and Folders


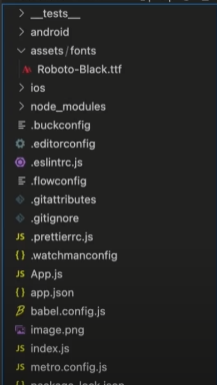
Now before we begin, please go ahead and open the location of your React Native project. We will be viewing each one from top down. Once you have opened it go ahead and follow along! Let’s continue.


__TEST___:


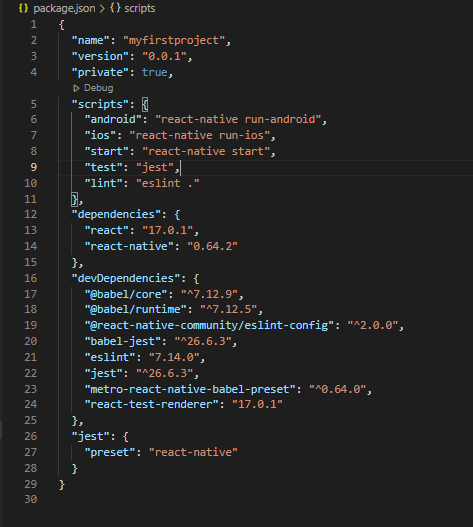
 First we have __tests__. Inside this folder is where tests are located. This is auto added as we initialize the project from the cli. This is specific for the packages called react-test-renderer and jest. What this does is to test our App, and make sure that it can be rendered correctly. We are able to run all the scripts by using the command ‘yarn test’ or ‘npm test’. Yarn is just another package manager similar to npm. One question you may be asking me is how did I know the command to run the test. Once we get into the package.json file. It will make more sense there but let's continue on!


ANDROID AND IOS:  

Next we have our android folder, this will basically have our android related files and folders. I won’t be going into detail of what's inside in this series but just know that this is for android! Next up is our ios folder. You probably guessed it, it's for our iOS side of course! Again we won’t be going into detail of the contents inside the folder.


node_modules:

 Moving on, we have our node_modules folder. This is probably one of the most important folders we have. This contains all our packages and dependencies for React Native. When I say packages and dependencies what exactly do i mean. Let’s go ahead and break it down.


Packages are written libraries that we are able to use without the need to do it from scratch. Dependencies are basically other packages that another package may use. They contain many different types of things we can use, like methods and classes and so much more. Pre-written code that makes our life easier! This folder contains all of that. When we install any new packages it will go inside this folder. In the previous video, when we did the command ‘npm install’ this basically looked inside our package.json and package-lock file. And grab everything we need from the npm repository. React Native uses all of these pre written code in conjunction to create what we see and work with, pretty amazing.


BUCKCONFIG:

 We have the .buckconfig file, Buck is a build tool that allows for faster iterations when compiling and seeing changes quickly.


Editorconfig eslint:

 Next up we have .editorconfig and eslintrc.js. These two files are in charge of containing consistent coding styles between different IDE and editors. Eslintrc.js is ESLint. ESLint is a tool that helps us developers find issues with our code before it even gets executed. It allows us to create our own rules and customize it completely to our liking. I won’t be going into detail of all the rules we can use in this video, but look forward to a future video that will cover this! Let’s keep going.


prettier:

Next we have prettierrc.js. This just helps with formatting when coding. Like adding single quotes instead of double, brackets spacing etc.. We can customize this as well.


Flowconfig:

 Moving on, we have .flowconfig.  This is Facebook's flow. It is very similar to typescript. All it does is to check for correct formatting when dealing with types.


Git ignore and git attributes:

 Next, we have our .gitattributes and .gitignore.  These will be related to github repos.

Gitignore are the files that we don’t want pushed or tracked by github

Gitattributes are for the files that are tracked and what to do with them.


Watchman:

 Finally the last config file. This is a configuration for watchman. Again the watchman checks for changes and updates. So any custom configurations go in here.
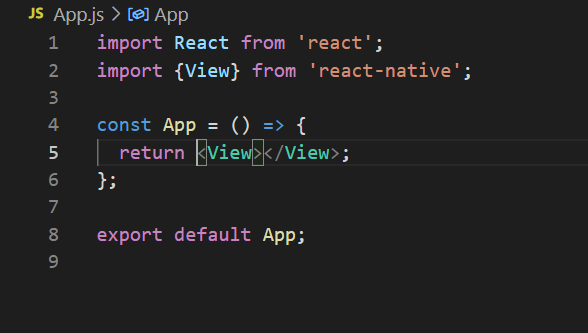
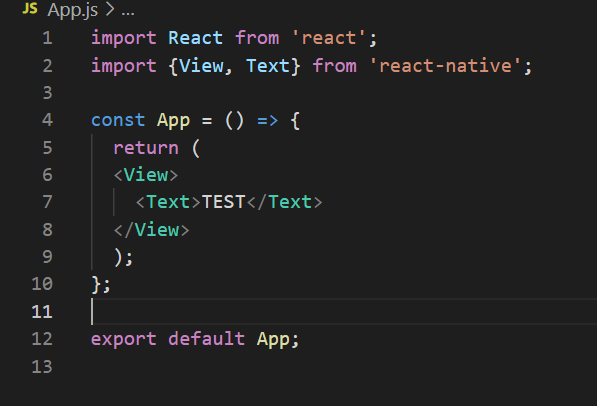
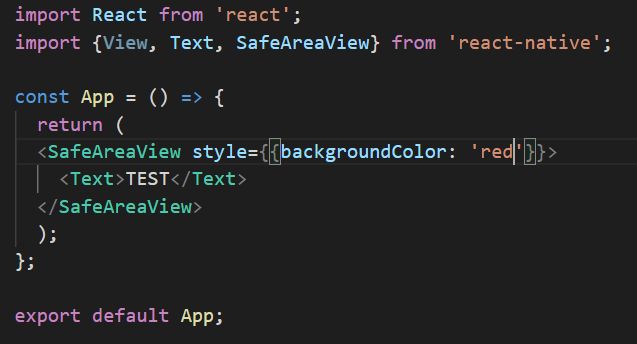
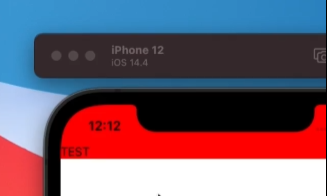
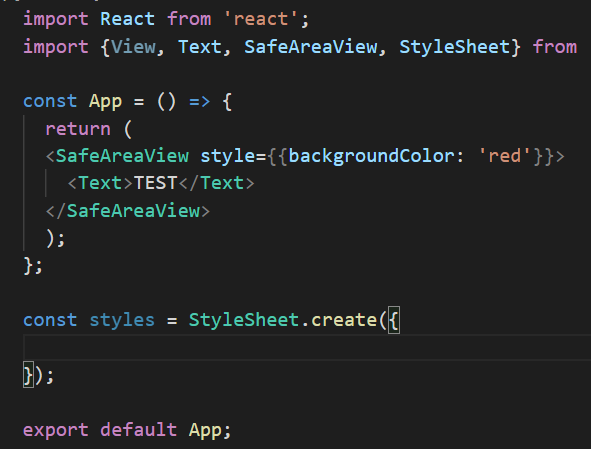
 

App.js:

 Next up is App.js. This is one of the most important files we have in our project.  This is the main file that is being rendered. Later when we create the component. We will dive deeper into this.


App.json:

 Moving on we have an app.json. This is a manifest format for describing web apps. It includes any environmental variables, add ons and other information.


Babel.config.js:

Next, we have our babel configuration file here. Remember babel is a tool that is in charge of converting our code into older versions of javascript.
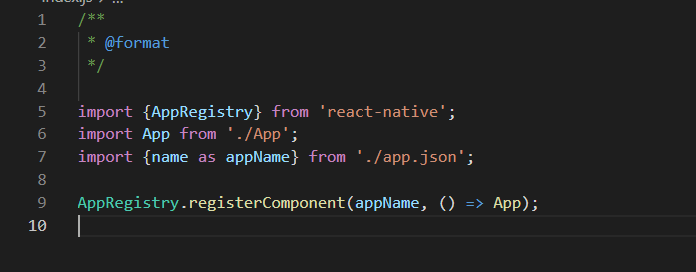
 

Index.js:

Next up is index.js. Another important file in our project. This file is the starting point for all react native applications. If we quickly take a look inside.

im1

We can see that the app gets registered here. We are importing our App.js file from earlier as well as the name from the json file. Then we are registering it using the AppRegistry method. That's it!


Metro.config.js:

Next up we have the metro config file. Any custom configurations for metro bundler can go within this file.


Package-lock / package :

im2

Here we have our packages list. Package-lock contains all the exact versions of dependencies to be installed as well as the dependencies of those dependencies. It will basically lock down the versions of the packages. This just ensures that no matter where you run this project, it will always be the same.

The package file just contains the minimal version of the packages used but not only that it contains versioning, name, author, and much more. Our scripts are set up here as well!


One thing to keep in mind is we dont need both the lock and package.json file.

We do forsure need the package.json file. But we don't necessarily need the package.lock file.


Yarn.lock:

Next up is yarn, you may or may not have this file. Again yarn is just another package manager, similar to npm. If you run yarn you will have this. If not this won't exist. This is auto generated when you run yarn install. No need to worry about this file!


So that is the quick summary of all the individual files and folders added to our project. All of these configuration files and folders work together to create our mobile application. Let's go ahead and move onto creating our own component.


Creating our own component


Before we go ahead and create our component. Let’s go ahead and go into App.js and remove everything. We will be writing this from scratch, so go ahead and remove it! After you have finished deleting it, let’s go ahead and get started. We need to first go over the common structure of components. At the top of all components, there will always be our package imports. Let’s first go ahead and import the React package so we can properly handle jsx.

im3


All external components, packages, and or files will always be imported from the top of the component. The react package is in charge of turning our jsx element into a React.createElement call. Next up we need to go ahead and create our functional component. Which is created with an arrow function.

im4
  1. Create a variable, in our case const App

  2. Set this variable as a arrow function

  3. Return a jsx element


As you can see we named this specific constant equal to our file name, which is a common practice. Of course there are other ways of exporting different or multiple objects from one file but we will go ahead and work with that in the future.


Extra :: There are 2 types of components, class and functional. We can create a class component as well but functional components are the most common type of component so we will only focus on functional components. With class components, you will need to call the constructor method as well as handle mounts and unmounts. Functional components just make things much simpler!


Inside the component, we have a return statement. All components will always have a return statement, which will contain jsx elements. In our case we are returning a fragment. It is just an empty tag that lets you group a list of children without adding anything extra to the DOM, but for now it allows us to return something. Alright we are almost finished. Lastly we need to export the component so when other components or files reference this file, it will know where to look. Finally at the bottom, we need to add the export.

im4

This is the most basic structure for a component as well as the standard way of how to layout the components.  We can now save it and see what gets rendered. Do you remember what is the correct command to get our emulator running?

IOS: npm run ios

Android: npm run android

Once we have it up and running let’s see what we get. Give it a second as it will take a bit depending on your computer specs. Once finally loaded what do we get? We get a blank screen which is perfect! Don’t panic, as this is good news.

im6

A blank screen means that we are not receiving any errors! Let’s move onto importing some components or UI elements provided by React Natives package. Lets import the View component. Do you remember where our imports go? That’s right it goes at the top.


We import the View component inside the curly brackets from the package react-native.

You might be wondering how come we are exporting this inside curly brackets. The reasoning is because the react-native package has many different types of named exports rather than a default export. If you take a look at the React import, it has a default export therefore we can just go ahead and import it as whole without needing to export individual components.  We can finally replace fragments with the View component. The View component is similar to a div.  This just helps with the UI and layouts. Let’s add some Text.

im7

Unlike divs we cannot just add the text inside the View component, react-native as a separate component to handle text. Can you guess what it will be? That’s right, it's just Text. Lets go ahead and import it then put it inside the View component.

im8

Save the file and we will go ahead and see the fast refresh feature go to work. It will be rendered on the top of the emulator. So this next part is where things can become complicated. Depending on the emulator you are using, you may or may not have this issue but again we are developing for all mobile phones therefore we always need to test multiple emulators. Let’s save it and see what happens.

im9

As you can see, my iphone 12 has a notch at the top. Therefore, the text is being rendered at the top left there but hidden! Depending on your emulator you might not have this issue but again we want to account for all types of phones. What will be our solution to this, simply we will need to add a different component provided! SafeAreaView to the rescue.

im10

After importing the SafeAreaView component, let’s go ahead and replace it with our View component. Now let’s save and see what happens.

im11

Boom! It takes into account the emulator or phone and helps push the Text component down. Cool! Again we will always have to test multiple phone types. It is common practice to always test on multiple phones to ensure that everything is set up nicely.  Congrats you have just created your very first custom component. Of course this is just our Main component being rendered but all components are created the same way. Let’s go ahead and view some styling next.


Styling our components


If you are familiar with CSS, then this should be very easy to adapt to. Let’s go ahead and get started. All the components provided by react-native allows us to pass a style prop to do any type of styling. Let’s take a look at the differences between a common property.

CSS: background-color: red;

React-Native: backgroundColor: ‘red’;


Can you tell the difference between the two properties? Of course first is the name of the property. CSS originally has the - in the name and React Native has a camelCase style. FInally we pass the property as a string for React Native. The reasoning for this is because when we pass the prop, we actually pass it as an object.

{

backgroundColor: ‘red’

}


React Native has a lot of similar css properties. There are many properties that we will continue to view as we continue to build out the app but for now just know that this is how it is being sent. One cool thing that we are able to do is pass in props as inline. So let’s go ahead and pass it inline.

im12

As you can see, we just simply put in a prop called style <SafeAreaVew style={{backgroundColor: ‘red’}} > This is an inline style prop. Let's save and see what happens.

im13

Nice! We now have a red background. But one issue we will have with inline styling is that we are sending it as an object. Therefore we can send errors.

{

backgrounddddColor: ‘red’

}

We are able to send this without React-Native sending back an error due to it not actually being an error as it's being sent as an object. If the properties don’t match then it just won't render anything. So how do we solve this. React Native provides a way to create StyleSheet Objects. Let’s go ahead and import it then create a new stylesheet object below the functional component.

im14
  1. Import StyleSheet from ‘react-native’

  2. Create a new const called styles that's equal to StyleSheet.create({}) below our functional component.

  3. Input our style!


Again we are passing it as an object therefore we need to create the individual properties. Let’s go ahead and try and pass an invalid property.

im15

Here we created a new object inside our StyleSheet object


background: {

backgroundddColor: ‘red

}


Let’s save it and see what happens.

im16

We get an error which is perfect! As you can see, when we create a style object via the StyleSheet component. It will go ahead and run the tests to check that these are indeed valid properties rather than just rendering nothing. Let's fix this then remove the inline style and add it.

im17

Awesome, we replaced the inline style object with our new object. To call it just call it as you would any object. 1. Name of the object: styles

2. Name of the object inside the object: styles.background


We are accessing the object inside the object, which in our case is the background property. Awesome! We have included a basic background color to our component. We will view more options as we continue onto the series but for now this is enough! Let’s move onto adding our own fonts.


Adding custom fonts


Let’s first create a new folder called assets where we will store our fonts. Then inside the assets folder we add another folder called fonts!

im18

Next go and find a font online that you would like, for this example we will use Roboto-Black. Just drag and drop it inside the folder!

im20

Next, we will then need to create a new file in the root directory of our project called react-native.config.js. This file will be where we put our custom properties for our project. Here is where we will link our custom fonts to the project.

im21

Just go ahead and copy what I have written above, as you can see the most important part is the assets location. We must link our correct location of fonts to this specific property. We just created these two folders!

Once this is done, we can finally run the command to link our fonts! The magically command is

npx react-native link


If you remember npx is to run commands from packages. This command will link fonts into the Info.plst for IOS and create a font directory for Android and copy it over.


That’s it! Let’s finally go ahead and use it in our project. Head on over to App.js. In order to use a different font we must use the property inside our style for our Text component.


fontFamily: ‘Roboto-Black’

im22

As you can see above, we created a new object inside the StyleSheet called textStyle and passed in the fontFamily property. The naming is very important and it must match exactly to the font we added, case sensitive. Finally we added it into the <Text> component. Again we are able to pass style={} prop into most components provided by react-native to do any styling. Let’s save and see what happens.

im23

Nice! It is now bolded and matches exactly to what we expected. It’s now using the correct font. Awesome!


Conclusion

Alright, if you made it here in the article then congrats on following along. We only scratched the surface of all the different types of components we can use as well as different styling. There are too many to cover for just one article as well as a video. But we will continue learning more as we continue to build out the application. If you are a visual learner we of course have another video you can watch alongside this article. If you have any questions again, just put them down on the video and we will respond!


Using React Native for Mobile Development - Part 3 Files, Folders and Components

Tags:   react